Good afternoon, friends!
We started the week off with a bit of gloomy weather, but today the sun is out shining brightly and making me happy! I’m loving this Fall and beginning to think that I’m made for Texas and Texas is made for me!
I have a pretty quick, easy and painless DIY Burlap Rag Wreath to show you today!
Let me back up a little bit…I’m new to the wreath world. I’ve only hung a wreath on my front door for Christmas. (remember, I come from a place with sub-zero temps through Fall and Winter…and Spring) I avoided the outdoors during the Winter like the plague…even if it was just to open the front door to hang a wreath! Brrr…I get shivers just thinking about it. Well, here in Texas, almost every front door is dressed with a wreath…or so it seems! It looks so lovely and is so welcoming. So, when Christen made this Burlap Wreath last month it inspired me to make myself a Fall wreath! I had some extra burlap I needed to use up from the burlap and lace table runner I made a few weeks back and while looking for inspiration, I came across several Rag Wreath tutorials made with fabric scraps. I like making “rag” anything, it’s so simple and you don’t have to fret over it being perfect, and so my idea was born!
This is how I did it:
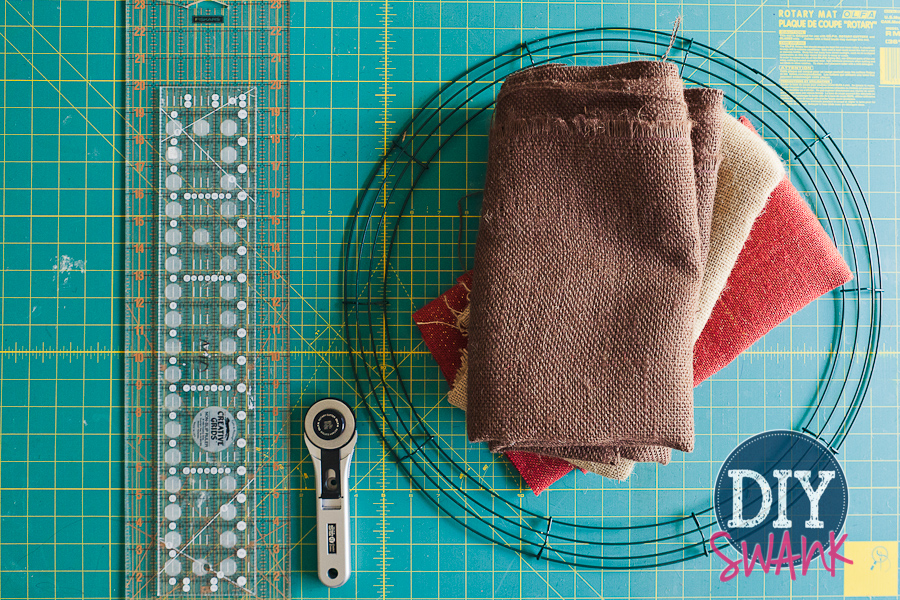
Gathered my supplies
I used 1 yard of the light and dark brown burlap and 1/2 yard of the rusty color.
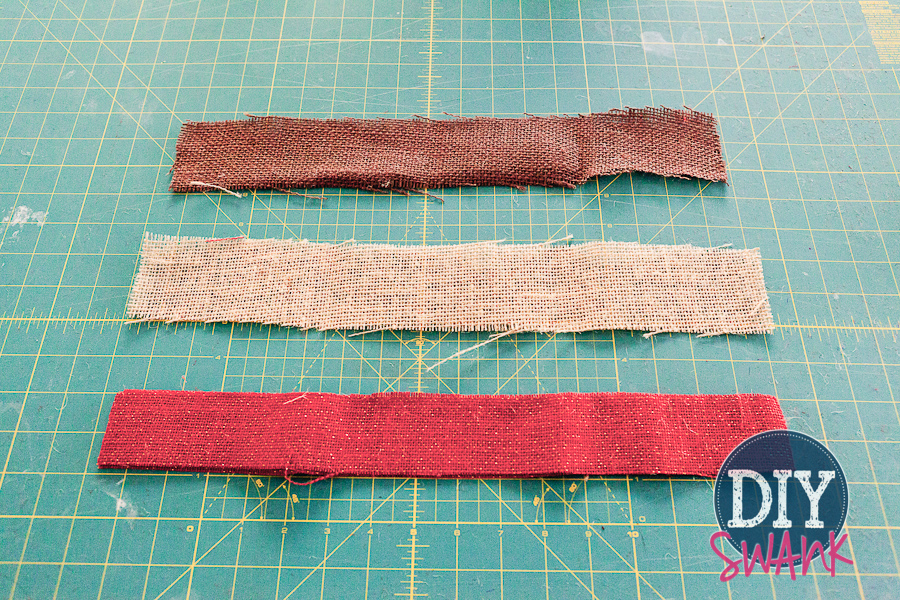
I Cut 2.5″ strips. *no need for perfection here….that’s the beauty of “rag” anything*
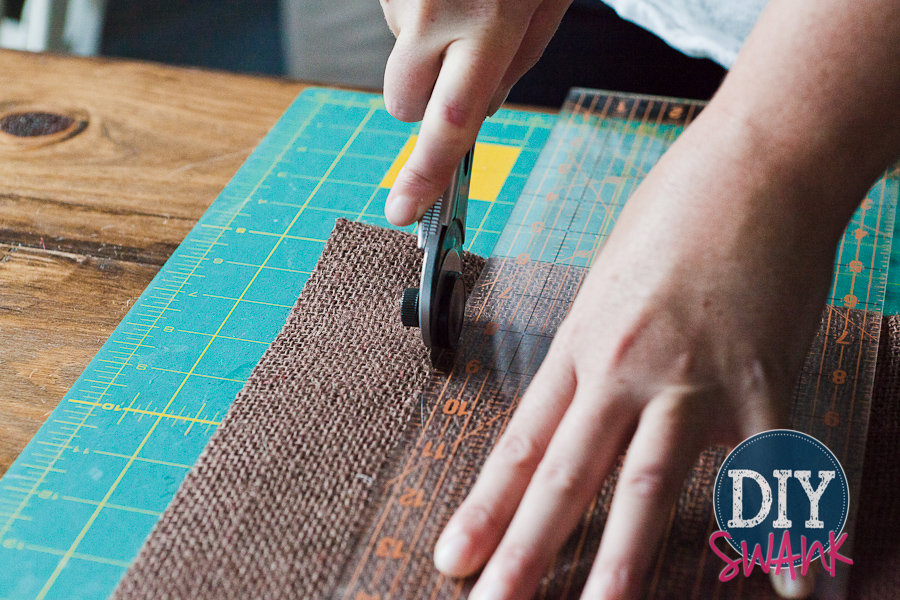
I then cut them into 18″ strips.
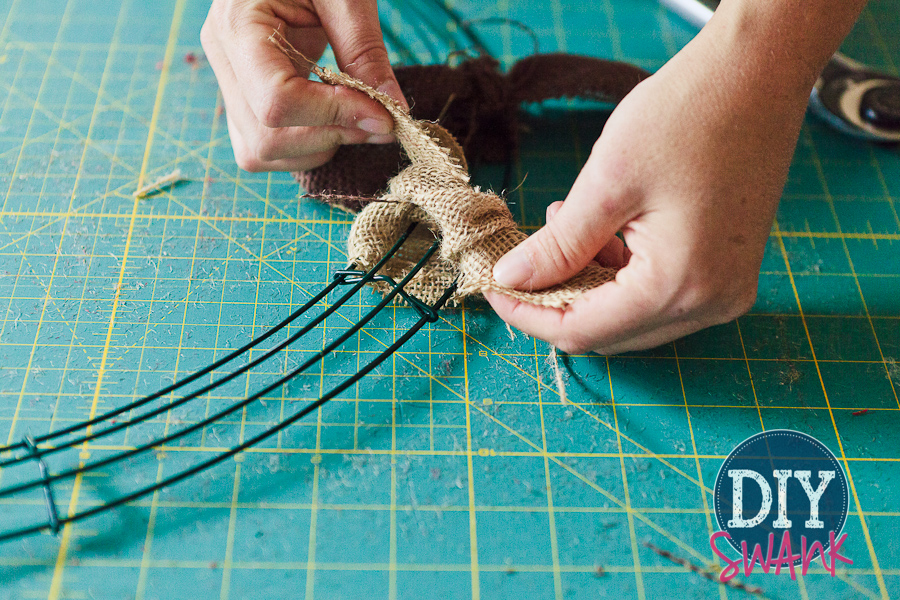
Then, I tied the strips around my wreath form.
On most of the fabric rag wreath tutorials I read, they would tie each piece around each wire(to get a fuller look)…but burlap is a lot stiffer and harder to tie in little knots…and truth be told, I was just too lazy to take the time. So I tied the burlap in a knot around the whole thing! I had more of the brown burlaps and so I tied all of them on first and then placed the rust color in between to add a little pop of color here and there. (I knew I was going to attach sunflowers beforehand and so I put most of the rust color behind the sunflower to give them a little pop.)
Now, you can accessorize it anyway you’d like. Like I said, I used sunflowers from a bundle I already had. I used hot glue to secure them.
And then I had this idea. I’m really big into words. I also like labels. So, I combined the two.
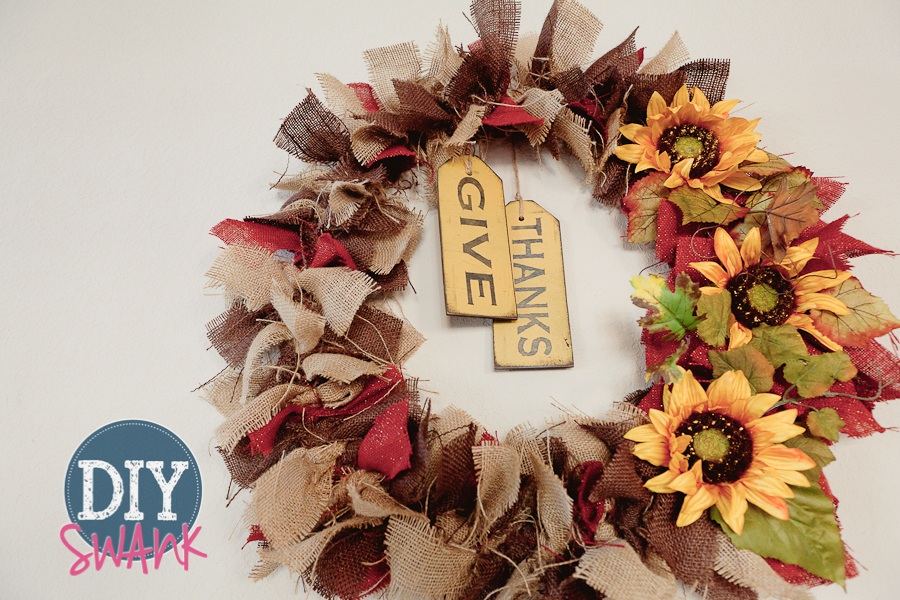
And made wood labels with some scrap 1/4 inch plywood. They measure about 8″long by 3″wide.
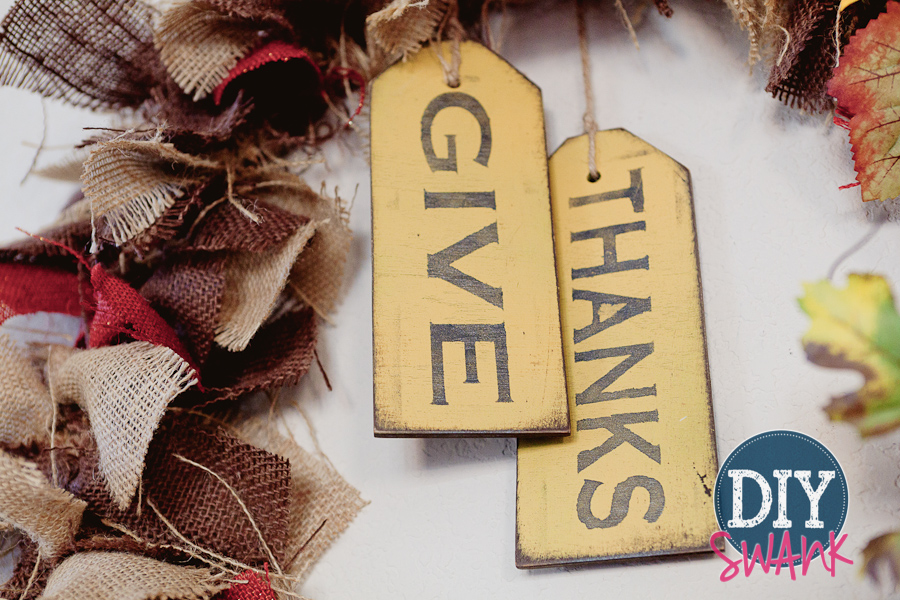
I then used the Silhouette to make a stencil and dry brushed the words on!
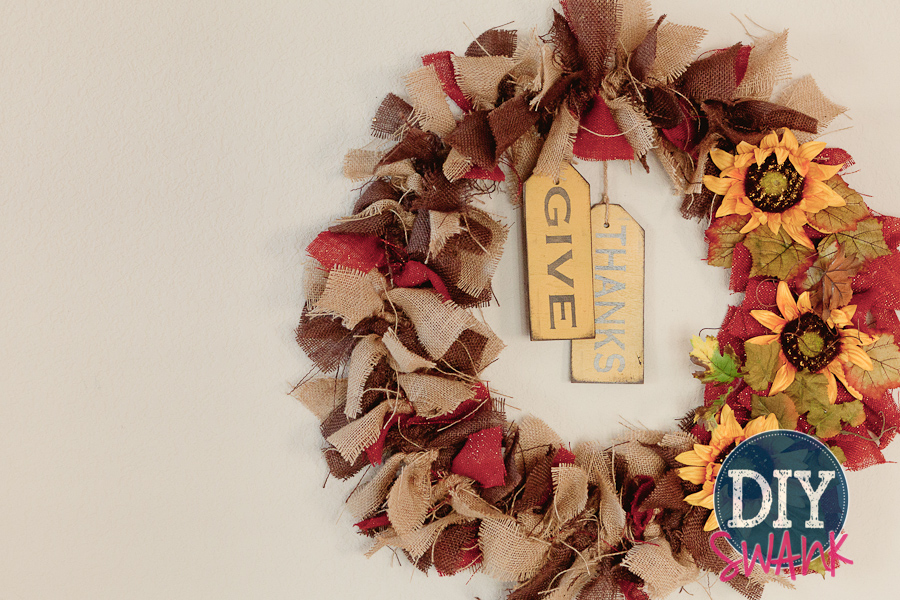
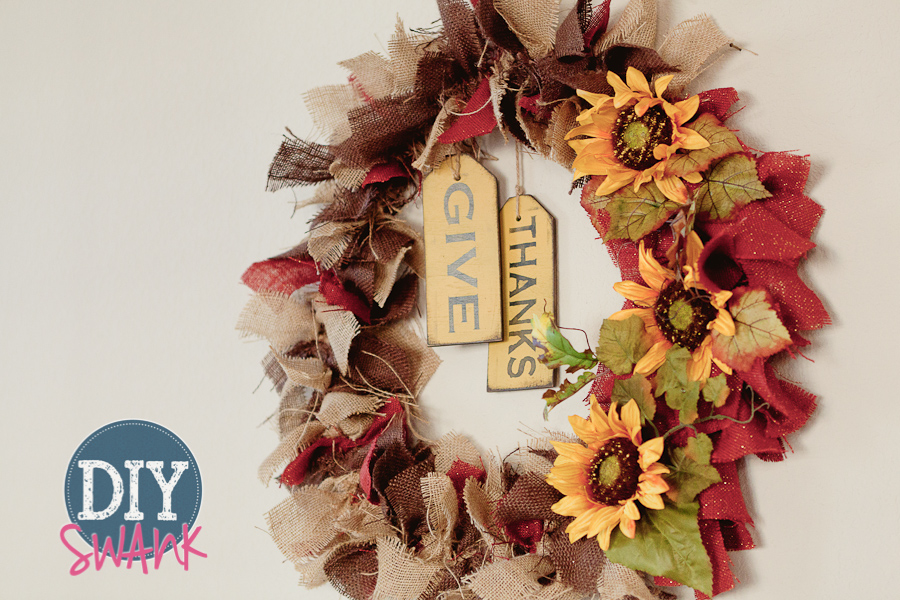
I am so pleased with how my wreath turned out! I have it hanging on my wall right now, because I want to look at it! If it’s on my front door I don’t get to see it as much 😉
Christen and I love this time of year and can’t wait to spread Holiday cheer with what we have in store for ya’ll! Stick around….you don’t want to miss it!


Your wreath is adorable. I’m about to make one for a friend, so I’ve been scouring the web looking for tutorials and I really like the way yours turned out!
Where do you buy your burlap?
Joann’s Fabric or Hobby Lobby
Such a beautiful wreath! I think I’ll head out tonight and buy my supplies! What size wire wreath did you use for this one?