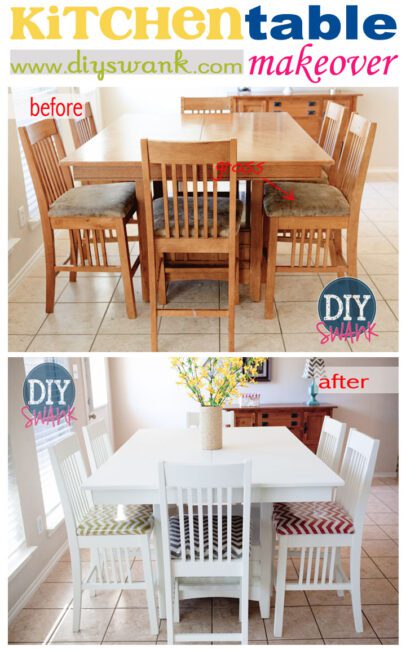
I’m so so so excited to share the before and after on my kitchen table makeover with you guys! eek!
You know how sometimes you might get a design vision and then when you attempt to create your vision, it turns out exactly as you envisioned?! And you just really impress yourself?
That was this for me. This is exactly how I pictured my table to be!
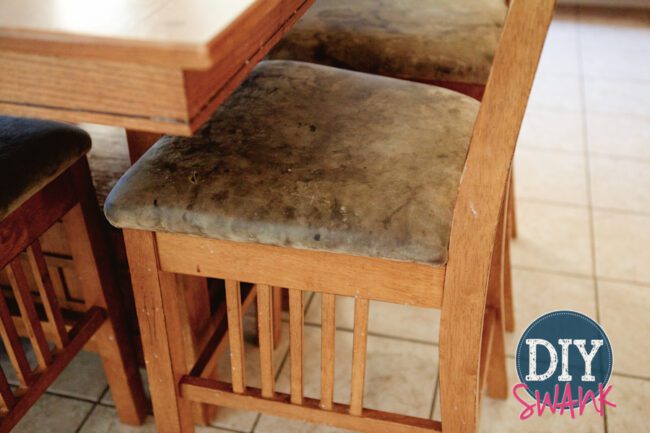
I had a huge annoyance in my life. That might sound a bit dramatic, but really, it was a huge problem for me. That problem was my kitchen table…the chairs to be more specific! It was one of the most annoying and embarrassing pieces of furniture in my home because it was im-possible to keep the seats clean. I hated it. Hated it! Sure, they were clean-able, but I had to clean them after every meal in order to maintain them! Do you know how many minutes of my life have been wasted on maintaining kitchen table chair seats?? Ridiculous! Needless to say, but with 6 children over the course of several years my expectation of clean seats faded. And I gave up!
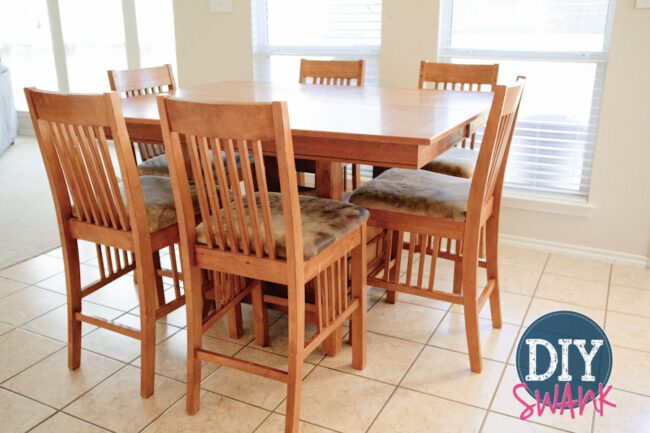
Here’s a before:
^^^That is horrid and oh-so-embarrassing!^^^
Because I hated the chairs so much, I’ve had this idea of doing a kitchen table makeover for a long, long time. But I was dreading it because I knew it was going to be a process. And then I couldn’t decide what I wanted to do with colors/fabrics. I can be so indecisive in my choices sometimes and I get really annoyed with myself over that. With the new house move coming up, I was cringing at the thought of bringing this old nasty furniture to my new beautiful house!
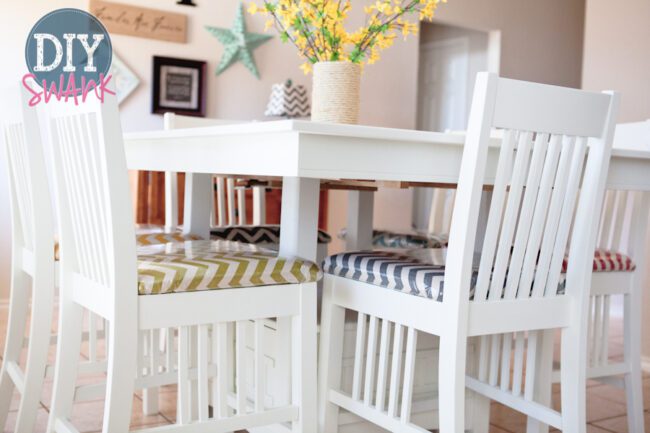
So, the moment I saw this collection of chevron stripe duck cloth at Hobby Lobby I knew it was meant for my kitchen table makeover! SCORE! That got me excited and I started making plans.
The first step in my kitchen table makeover was the prep. The prep work is the worst work! UGH. But it is the absolute most important work! Never slack on the prep. I’ve learned the hard way. If you are painting old furniture, you need to be sure that the piece is clean, clean, clean. So, I scrubbed and scraped off years of gunk from all the cracks and crevices. Took forever. Once I was done, I lightly hand sanded over the pieces with a 120 grit. Nothing major just enough to take a little sheen off and give the paint something to adhere to.
I started out with a DIY chalk paint recipe. This was my first experience with chalk paint. I thought painting the table with chalk paint would be the best route because the weather was not agreeable to painting in the garage or outdoors. I’m a spray paint, type of girl and that’s what I really wanted to do because it’s easy! But with all the hype about chalk paint I thought I’d give it a try to paint indoors. It worked. No complaints. The Paint adhered well and dried fast. The only problem was that I found it took several (several) coats to get the coverage I needed. It was a major pain in the you know what! I had the table painted but after the 4th coat of paint on the spindles of one chair + all the drips and brush marks to go with it + 3 days of painting + the frustration + juggling life in between…I could not handle it anymore! I threw in the paint brush and went with the spray paint that I know and love.
At that point, we happened to get a break in the cold weather and so I set up in the backyard and made a trip to Home Depot and picked up some of my favorite spray primer. First, I primed the remaining chairs. It took all of about 20 minutes! Then I flipped the chairs over and sprayed primer to get the different angles. Another 20 min. Spraying those chairs was so awesomely easy, I borrowed Christen’s paint sprayer and sprayed over the primed chairs with my paint! Spraying is SO much easier. I love the sprayer! It made painting the spindles way. easier. And the finish turned out much smoother. No brush marks, no drips. I love the finish I got with the sprayer!
Once the painting was done, I worked on the seats. This was the easy part.
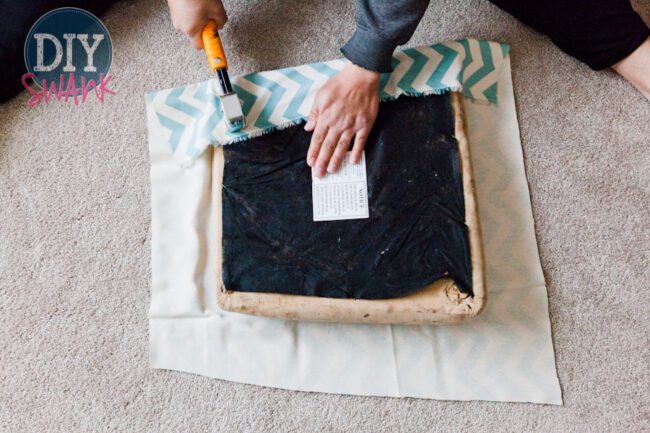
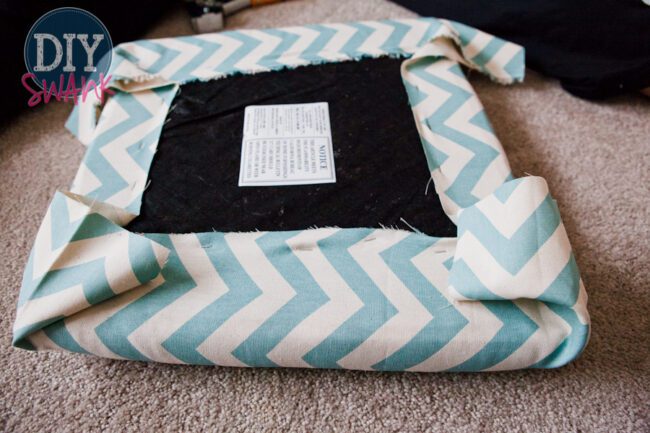
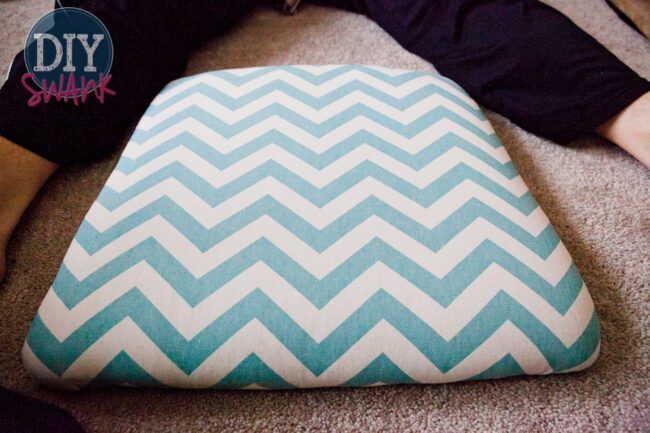
I cut the fabric with about 4″ extra around each side using the chair seat as a guide. Then, I stapled one side leaving the corners unstapled.
Then I turned the seat to the opposite side and stapled pulling the fabric taught. I repeated steps 1 and 2 on the remaining 2 sides. Then I worked on the corners. There was no rhyme or reason to my method. I worked in small pieces pulling them whichever way I needed to create a smooth transition over the edge. I stapled each small section down, yes, I used a bunch of staples (probably way to many). Before I stapled, I played around with folding the fabric over so I could get an idea of where I was heading.
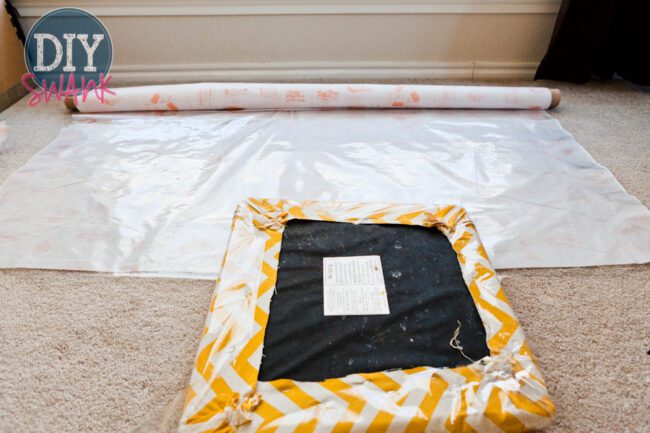
Once I had all the seats covered, I moved on to putting a clear furniture upholstery vinyl over top. Gotta keep those cute chairs protected! I found my upholstery vinyl at JoAnn in the home interior fabric section on the big rolls. I secured it over the fabric the same way.
It is a little more tricky to work with and I ended up with some creases on the corners but they don’t look bad.
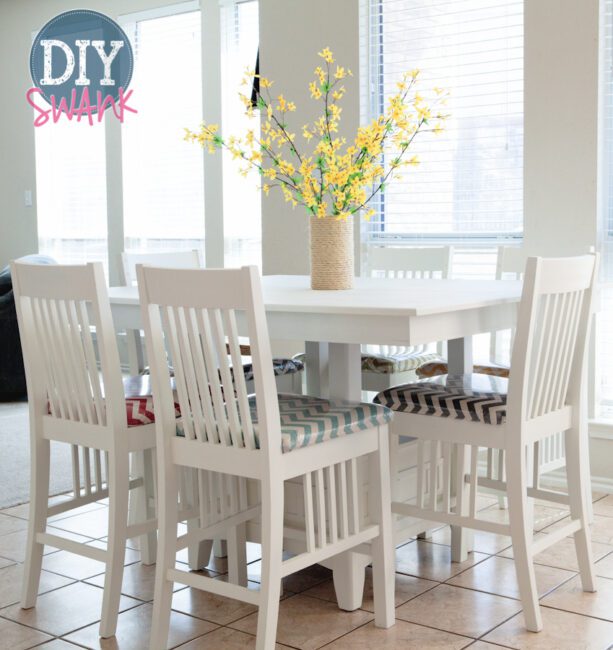
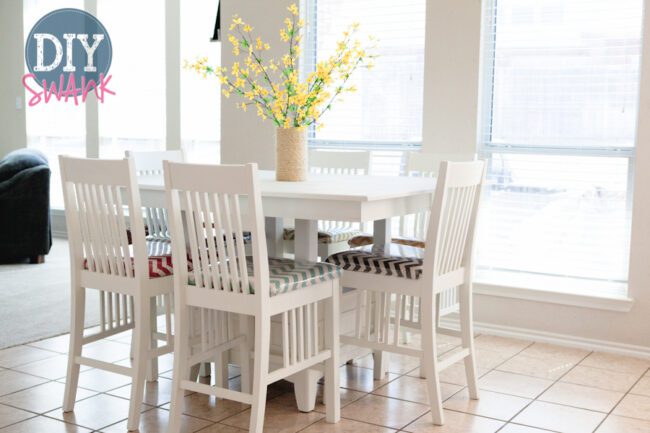
Here’s the after:
Can I just say that I LOVE how my table turned out! Every morning when I wake up and see it, it’s like a breath of fresh air.
Corny, I know, but really it is so pretty to look at and I just love it.
I am always amazed at what a little paint can do! Thanks for stopping by. If you want to see more of what we do everyday, come follow us on Pinterest and Instagram!


We have the SAME color and type of seat covering on our seats and while ours aren’t that bad yet, they’re sure to get there with my ridiculously messy kids lol. I like how you re did this. I wish I could find a good square table somewhere to refinish! Looks great!
Thank you, Amy! I here ya, there is no way around messes with kids. My only regret is that I didn’t re-do them sooner to repel all those messes for sanity purposes!
I’m glad I found this post! I need to make over our table too, table AND chairs. There are water rings etc all over the table, and kids plus WHITE chair fabric do not go together lol. I’ve bookmarked this for later! 🙂
Tonya – I’m so glad you found us, too! 🙂 Good luck on your table makeover! If you have any questions when you get to it let me know and I will be happy to give any advice I can!
OMGoodness! I am in love with this tutorial!! Consider it pinned. Thank you for sharing 🙂
Thanks, Jessica!
This looks incredible!
Oh I love that! I don’t have chairs that I can do that to sadly, but now I’m going to be looking at them at auctions! We’re trying to find a larger table as our family has outgrown ours and we have some horribly mismatched chairs.
Wow that came out really nice! I love the pattern and the colors of the chairs.
yes it’s very very lovely!!!
I can relate to the envisioning and turns out exactly as it is part.. I did some make over here a few months ago and it turns out just the way I envisioned it 🙂
check it out here> https://www.pehpot.com/2014/02/welcome-to-our-home.html
I love this! I’m so excited to try this with my kitchen table and chairs. I was wondering what brand of paint you used after you used the primer, or any other paints you would recommend?
So you still just painted table, not spray paint?? What type of paint brush did you use? Is paint staying on good with wear and tear of kids? I want to paint our current table and just not sure since never done a project like this. Thanks!! I love how urs turned out!!!