Howdy friends!
I hope your Friday is off to a fantastic start!
The temps are falling *slightly* and I’m now realizing why fall is a favorite season for so many people. With the Fall season in Alaska only being about 2 weeks the blink of an eye…I have been relishing in all this beautiful, sunny Texas weather! I love it. So much that I think I may start calling this place my home. 🙂
And speaking of my home…now that I get to experience a full 3 months of the Fall season…I have been loving Fall decorating! Like these cute printable Halloween signs and the Fall block letters and my burlap wreath, I’ve been out in the garage with the door up, basking in the mildly warm air, and jammin’ to the tune of the saw, sander and spray cans! Oh, yeah.
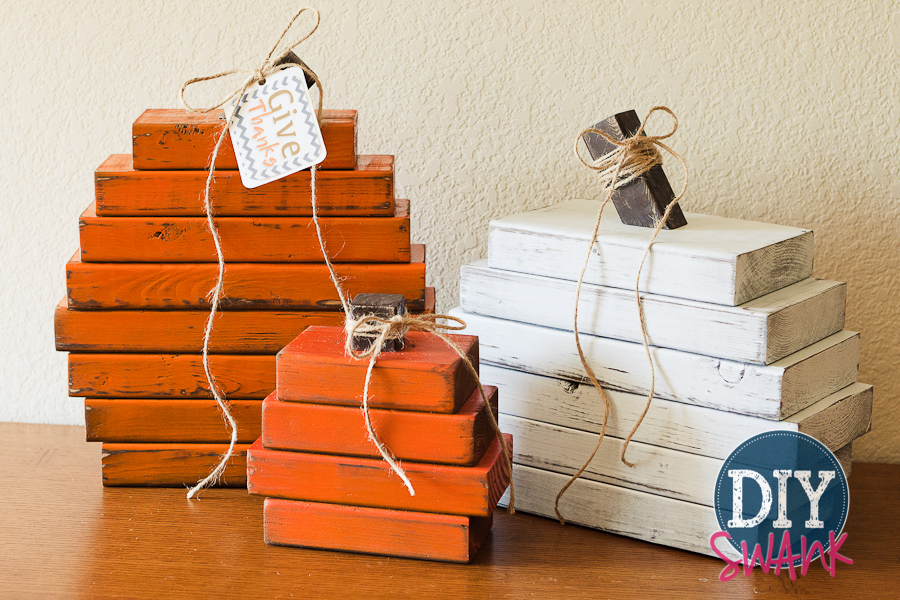
If you’ve been following DIY Swank on Instagram or Facebook, you already know that today I’m sharing how I made these Rustic Wood Pumpkins!
*This post contains affliate links
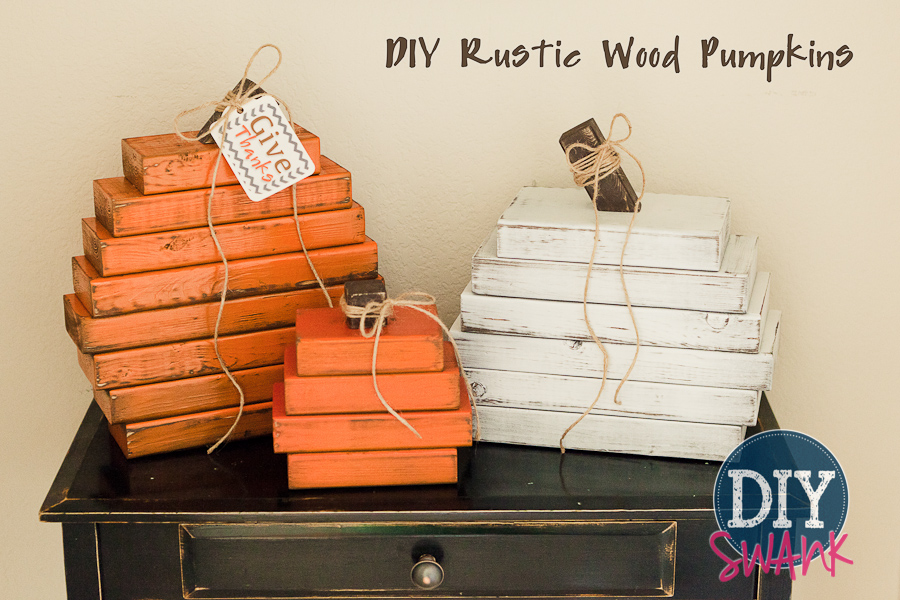
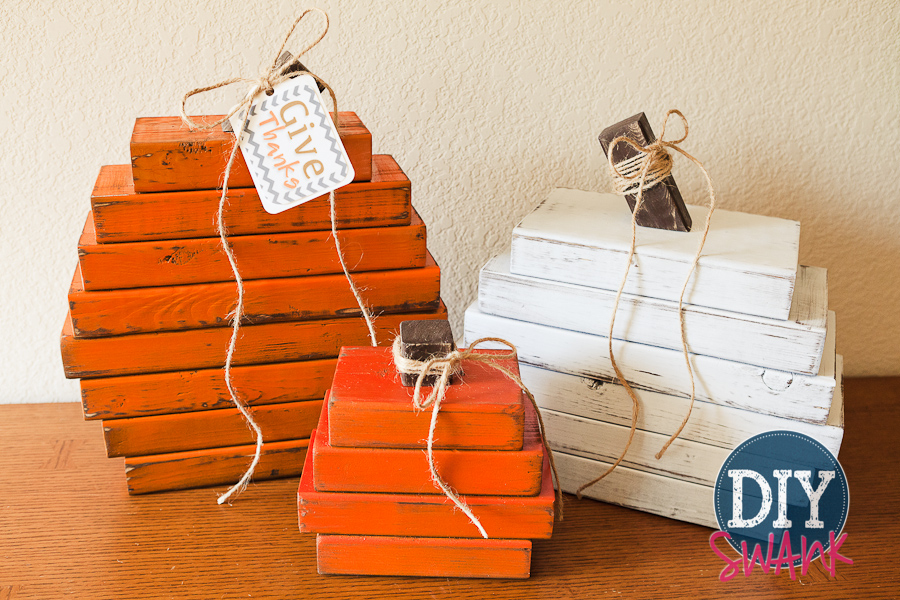
I’m really liking how they turned out and now I can’t decide if I want them on my porch or in my home. They are pretty simple to make and go together fairly quick. I’m a quick gratification kind of girl and I’d love to be able to tell you that I snapped my fingers and they were done, but I can’t. So, I’ll tell ya it took about three-ish hours of my time over the course of a day in between laundry, dishes, lunches, poopy diapers, and my taxi-cab services. The best part about these pumpkins is they are the perfect project to use up scrap wood! I made 3 pumpkins completely out of scraps from my garage, BUT, if you don’t have scraps laying around…got to Home Depot or Lowes and look in their scrap bin. You can score 2×4’s or 2×6’s for, literally, cents. Check it out! I never-ever leave Home Depot without checking the wood scrap bin, and I’m there a lot, which is one reason that I have so many scraps….I just can’t turn my back on a good deal, it’s a sickness, I know. Anyway.
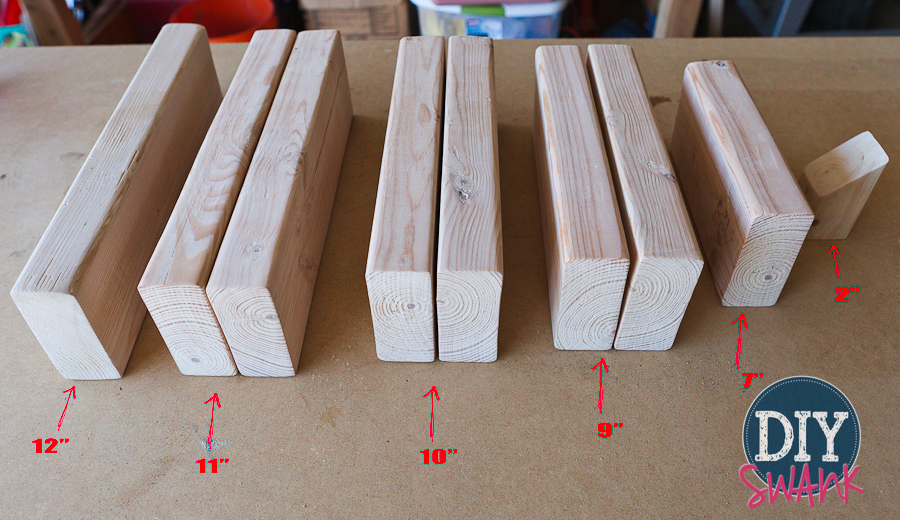
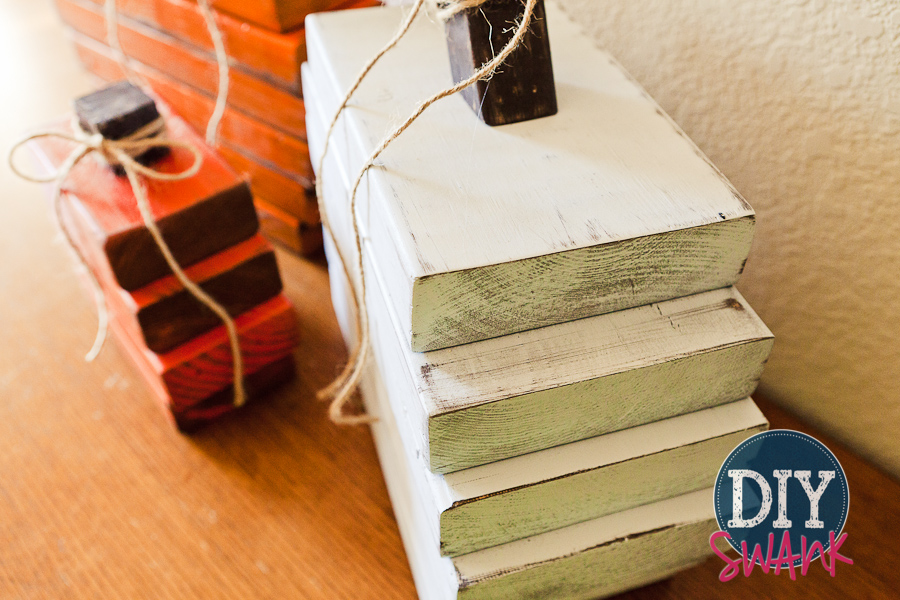
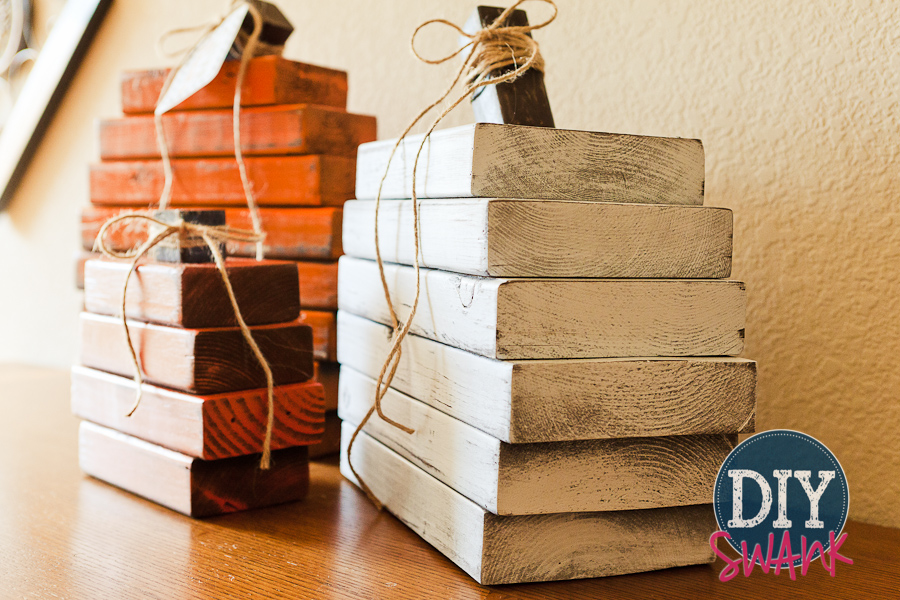
*Like I said, I made 3 pumpkins but for the sake of this tutorial I’m only giving measurements for the tall 2×4 pumpkin. Every step up or down is a 1″ difference except for the top piece. Also, you will see photos using 2×6’s because I made the middle sized pumpkin using 2×6’s to give a more dimensional look*
This is what you will need:
– Either scraps of 2×4 or about one 2x4x8
– 1 scrap of 2×2 about 2″-3″ long or improvise if you don’t have a 2×2 ( I cut mine at a 45* and 30* angle)
– Wood glue
– Clamps
– Sander and/or Sandpaper
– paint (see below for what I used)
Here’s how I did it:
First, I measured and cut the wood.
Then I sanded it with a 120 grit. Normally, I would use a finer grit but I didn’t have any so 120 it was!
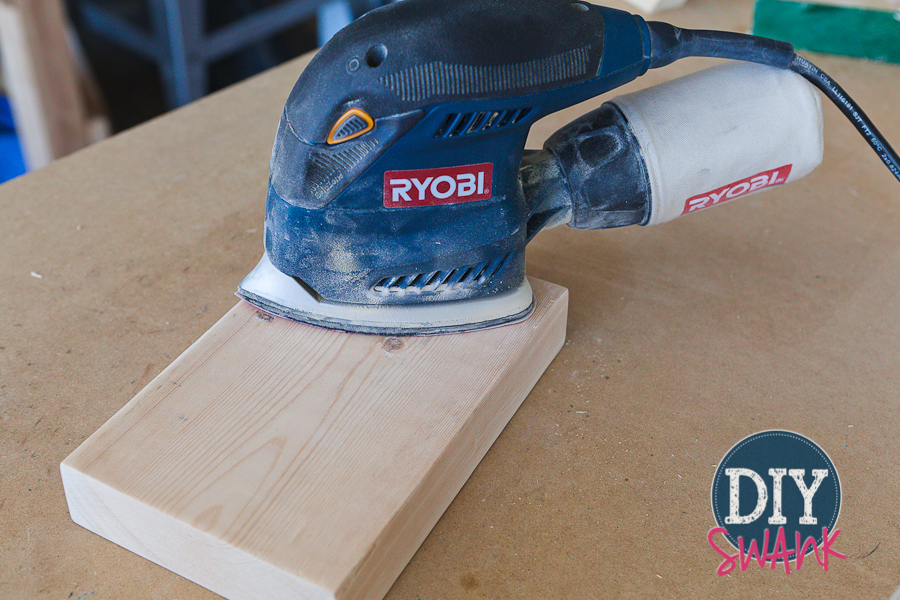
Yes, that is a Ryobi Corner Cat Sander WITH a cord!
I love it and while the big buzz right now is on the cordless tools (which would be wonderful by the way), I had this before I knew cordless was cool. If you need a sander and don’t want to invest in the cordless system then this is the perfect sander for you! It does a great job on any project, big or small, and it costs about $30 at the Home Depot.
Moving on…
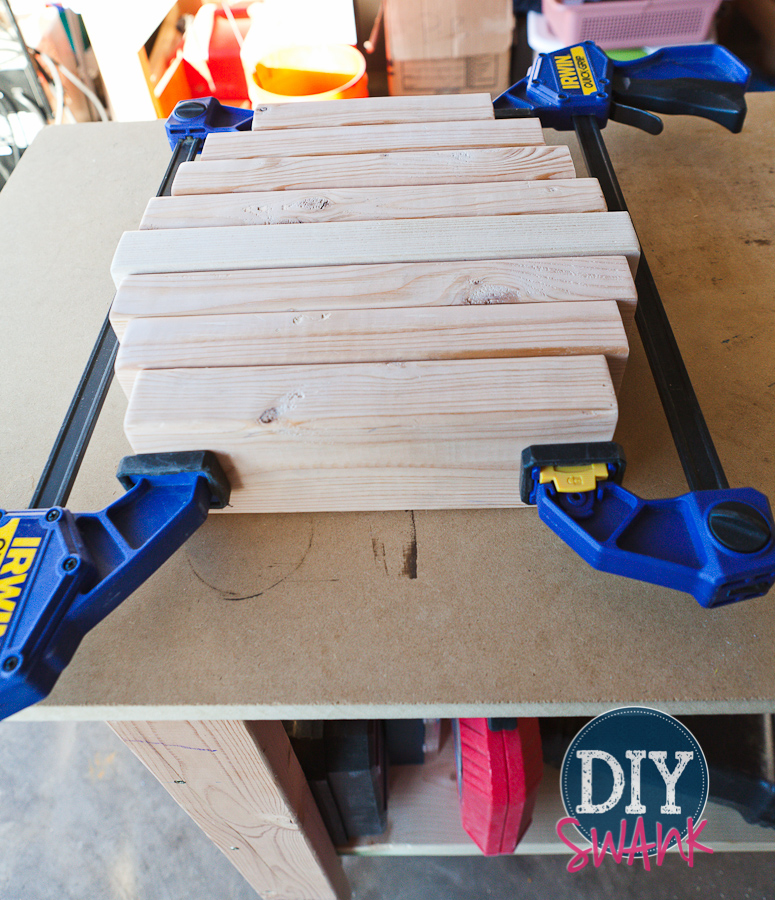
Then I stacked them up.
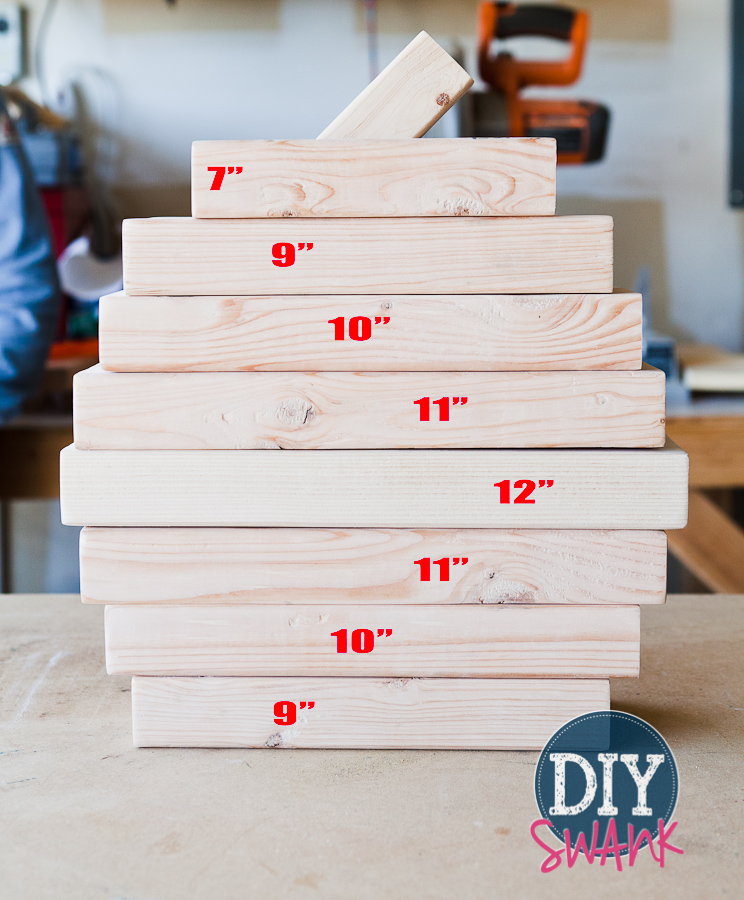
Next, I glued them with wood glue.
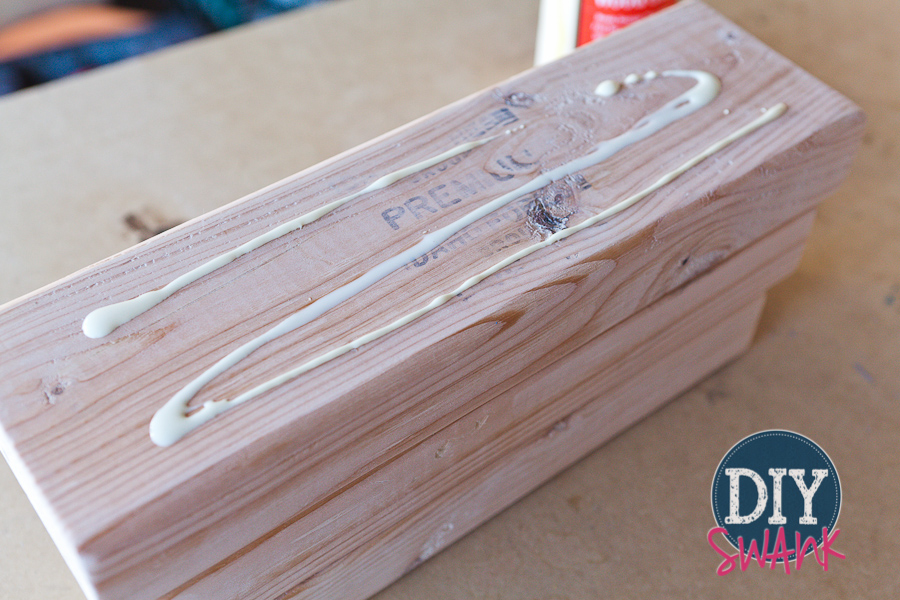
Then I clamped them. And let them dry…very important to let them dry completely.
Originally, I was going to secure them with glue and nails or screws. But once I glued them and they dried, they were pretty solid.
And maybe against my better judgment, I went with my husband’s recommendation.
So here’s my disclaimer everyone *Mr. Right said they would be fine with just the glue, so if they break… – you know it – ….it’s all his fault and I get to hear “you were right, again.” He thinks it’s music to my ears….HA*
I would recommend securing them using a nail gun or screws if you want to be sure it doesn’t fall apart.
Up next is the paint.
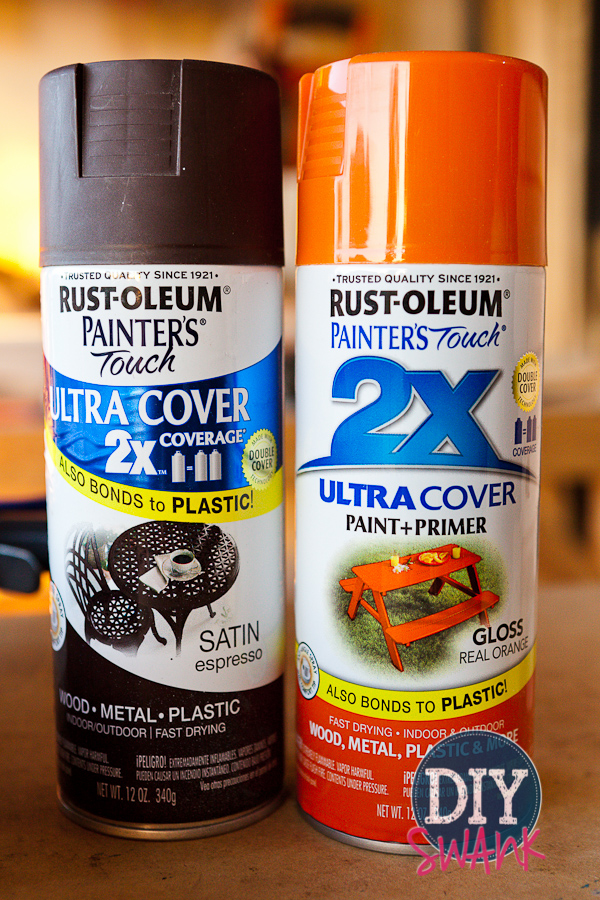
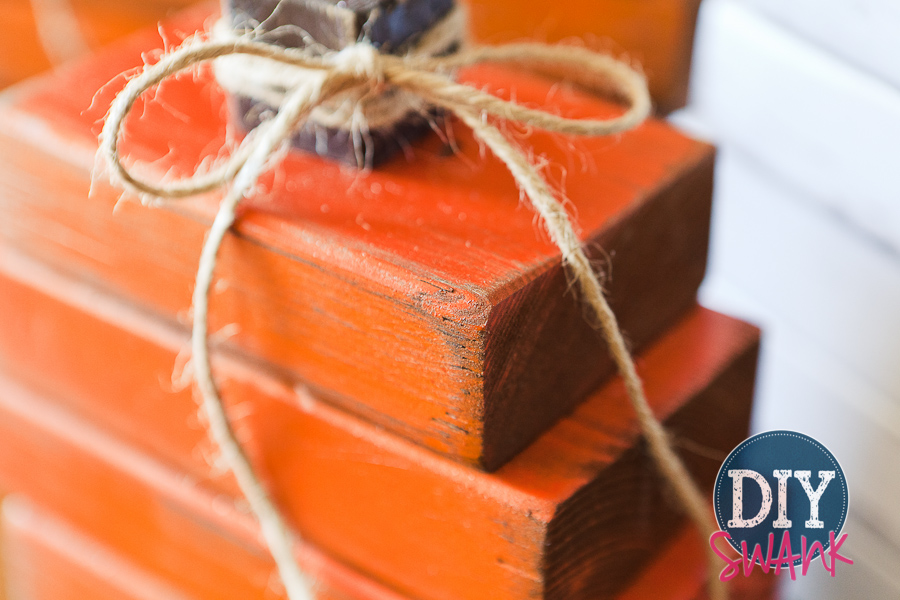
I used Rustoleum’s Painters Touch in Espresso for the base and the stem. Then I painted a light layer of Rustoleum’s Painters Touch in Real Orange over the brown.
*for the small pumpkin I sprayed a very, very light layer of Rustoleum’s Painters Touch in Fire Orange to give a little dimension in color…’cuz I’m all about dimension ;)*
I painted the entire pumpkin with brown first and let it dry.
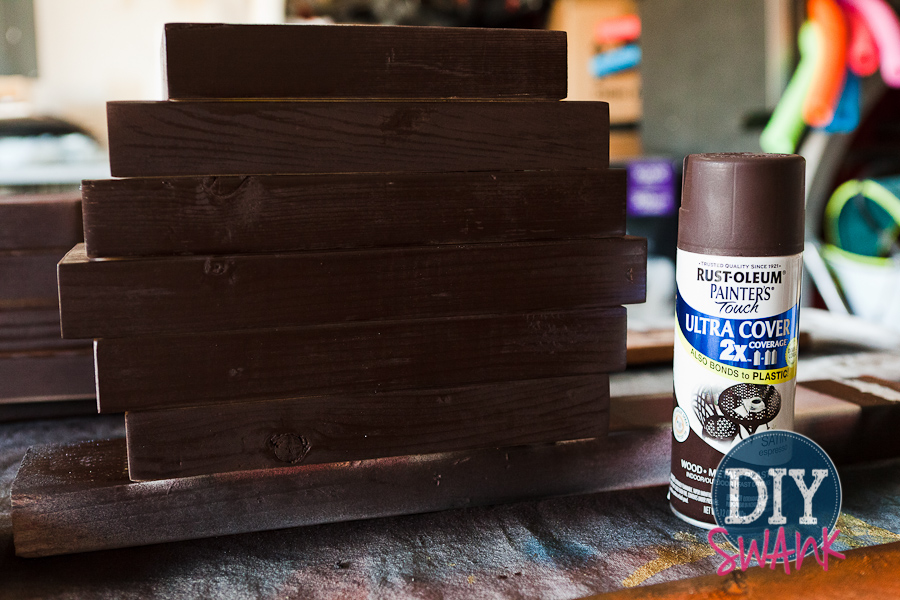
Then I flipped it over and painted the undersides brown and let it dry.
Then I got a little eager and didn’t take any pictures of painting the pumpkins orange or white! But I’ll let you know, you don’t need to be perfect in covering the brown with the orange. The orange is very bright, so less is more, unless you are going for the solid look! Now, I know it’s hard to do, but you must let this layer dry completely before distressing.
Once the paint was completely dry, I lightly hand sanded to distress the whole pumpkin, more-so on edges and in crevices, with a 60 grit sand paper. 60 grit is pretty rough, so just go easy until you have your desired look!
Now, for the stems. Distress your stems a little bit and this is where I used more than just glue…I used glue and the nail gun to attach the stems. I don’t have a picture for that either, because I’m just not talented enough to hold a 5lb camera while simultaneously using a pressurized nail gun, but I nailed them in at an angle.
And Ta-Da…
I’m pretty pleased with them.
This is where you use your creativity. Or you can just copy because I know that’s what I like to do!
Finish them off…I used Jute twine and wrapped it around and around and then secured a bow with just a dab of hot glue. I like the loose twine look, not the completely glued down look.
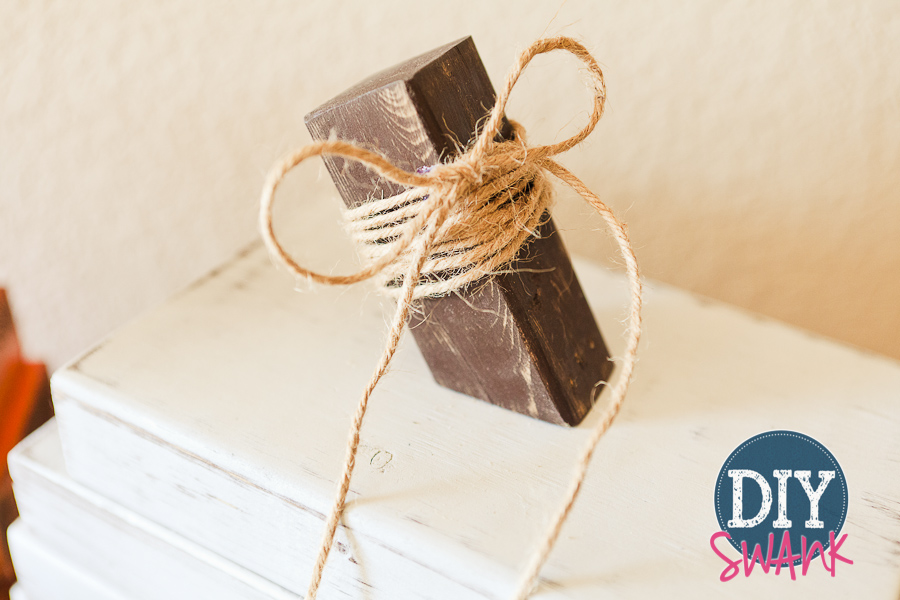
Then I had the idea to add a tag. It’s these little details that set it off!
I’m a detail girl…love the little details!
If you love these as much as I do, please share them with your friends and pin, pin away! And if you make a set yourself, I would love to see them!
Did I ever tell you that one of my favorite things ever is to see other people’s creativity, so please share your photos and tag us so we can see! I’d love to see pictures, seriously.
Follow us on Instagram, twitter or like us on Facebook to see what’s next!
Happy Friday!


Megan- These turned out so cute!!!
Megan, I love these pumpkins! I hope you don’t mind that I shared your link on my blog post about my favorite DIY fall decorations. Maybe you’ll get a little more traffic. Thanks again for such a great post!
Thanks, Amy! And thanks for sharing us with your peeps 😉
What are the dimensions you used for the small pumpkin?
Just love these!! They are so darling. Pinning and thanking!
are those mini-clamps? i just looked up “clamps” on lowes’ website…i know nothing about clamps and am JUST starting to do diy projects with saws and other tools. i’m so excited to make these! fall is my FAVORITE season!
Hi Megan,
Loved your pumpkins! I’m going to make some with one tiny modification…. I’m going to step each layer out 1/4″ up to the middle and then back 1/4″ towards the top to give an even more ‘pumpkin’ 3D look. I might even try making one up with the planks vertical to match the lines on a real one!
You see, that’s the beauty of inspiration, you just need the initial spark (from you!) to set your own creative juices flowing, because for sure I’d never have thought about doing this without your inspiration!
Incidentally, for anyone making these that don’t have clamps, simply make them standing up and pop a brick or other heavy(ish) object on them. 2×4 and especially 2×6 are easily sturdy enough to take this.
Oh, and of course he was right (lol!), wood glue is stronger than the wood itself! Anything with a large surface area (like these pumpkins) are best glued.
Stay well
Ian
These are so cute! I made one but I don’t know how to show you a picture of it! Lol
very cute … i think i have enough in my wood pile too
Thanks for the measurements for the big pumpkin! What were the measurements for the other two pumpkins??
I absolutely love these. I think I will have to try to make some for myself.
Thank you for sharing. ?
Love these. What is the exact color of the white pumpkin?
Thank you for sharing theses on Pinterest.
I love these! Thank you! Could you possibly send me the measurements for the middle size (white one) please?
Thanks!!
its just a stack of 2×4’s is this a joke wow
My sisters and I do a craft every month and this month we made your pumpkins. They turned out SO CUTE!! Everybody loved them and they each turned out a bit different. Between all of us we made 12 pumpkins and it was so fun! Thanks for the inspiration!